I've recently gotten back into the idea of monetizing my images and there are a number of options one can pursue to make money from your photos. Microstock is one of those options...
Microstock
A contentious avenue for sales to some and one I haven't put a lot of time into. I've been getting back into it, but slowly. Keeping the motivation going through rejection, a large amount of time editing and keywording images, with little payoff in the beginning has been a struggle. But I'm determined to give it a go and see where I end up - I'll be updating my progress here in future posts.
Microstock is mainly Royalty Free images requiring a model/property release (if applicable) and counts on multiple sales of the same image to recoup the cost of production due to the low cost per image in microstock. Sales typically range from $1.00 - $20.00 per image, with only a percentage of that going to the photographer. It is open to anyone with a decent camera (usually 4-6 mega pixels and above), but most sites have quality standards that you must meet in order to submit images for sale on their site.
A few of the major microstock sites to check out if you're interested in this:
iStockphoto
Shutterstock
Dreamstime
CanStockPhoto
Fotolia
Tuesday, February 23, 2010
Friday, February 19, 2010
A Long Hiatus
A long hiatus from this blog...over a year!! But I'm back and have resolved to get some regular posting in.
I've recently revisted my ambitions of becoming a pro photographer. While, at this rate the going has been very slow, I'm excited at the possibility of growing my knowledge and skills as a photographer. And if it takes a while, if ever, to reach that label "PRO" then so be it.
I haven't been shooting nearly as much as I should be, but I think that's the case with most photographers. Makes me think of the book title from Chase Jarvis I cam across the other day "The Best Camera Is The One That's With You: iPhone Photography" . I haven't read the book, but inspiring none the less.
A few Photos from 2009:
I've recently revisted my ambitions of becoming a pro photographer. While, at this rate the going has been very slow, I'm excited at the possibility of growing my knowledge and skills as a photographer. And if it takes a while, if ever, to reach that label "PRO" then so be it.
I haven't been shooting nearly as much as I should be, but I think that's the case with most photographers. Makes me think of the book title from Chase Jarvis I cam across the other day "The Best Camera Is The One That's With You: iPhone Photography"
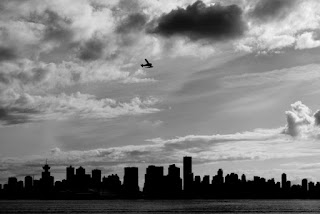
A few Photos from 2009:

Vancouver Skyline, Float Plane Overhead

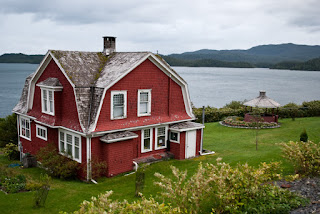
Prince Rupert, British Columbia
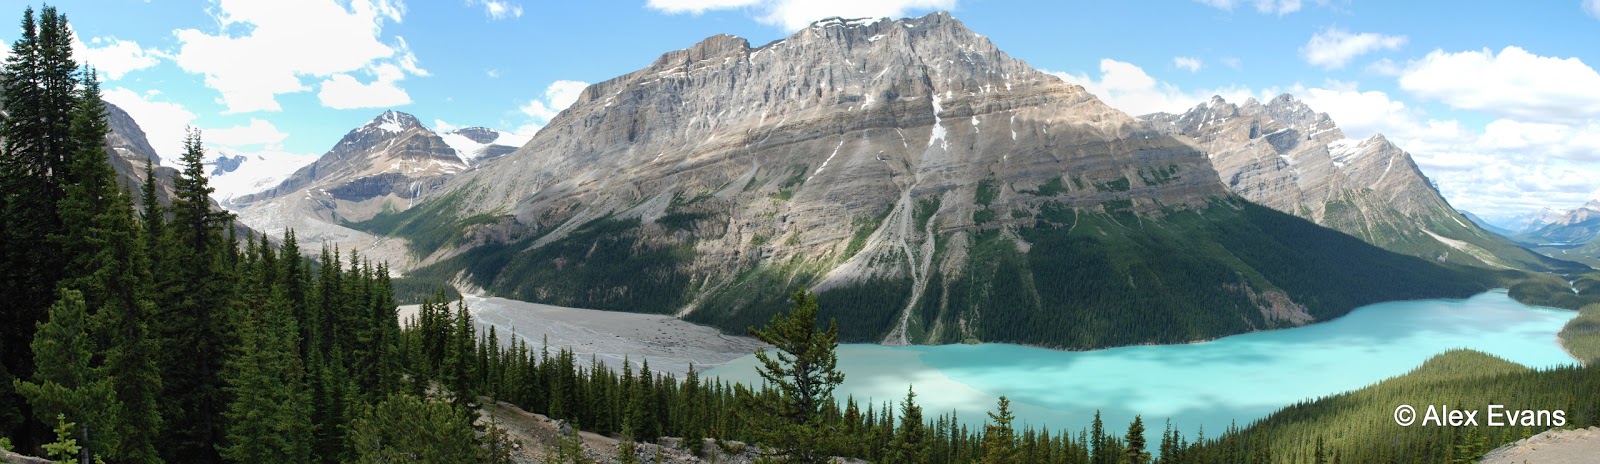
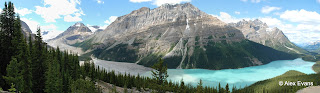
Peyto Lake, Jasper National Park, Alberta
Monday, February 23, 2009
Friday, February 6, 2009
My Geotagging Workflow: RAW / DNG Files and Lightroom
Although I haven't tried any dedicated plug-ins in Lightroom for geotagging photos (one is available here), the workflow below is relatively straight forward and allows you to geotag photos manually or automatically with a GPS track file (NMEA, GPX). I've summarized a workflow for geotagging JPEG files using the program locr already, but in this post I'll concentrate on DNG files (and RAW files, assuming you'll be converting your RAW files to DNG format). Adobe has a pretty straight forward converter for this here.
1.) Find the files you want to geotag. If the files are currently in RAW format, I convert to DNG since storing metadata in RAW files can be problematic and/or keeping track of sidecar files can also be a chore.
2.) If you have imported your photos into Lightroom already, now is the time to save your metadata to the files - any changes, keywording, edits, etc. you've done to each file in Lightroom. This step is crucial, especially if you have done a lot of edits to your photos before geotagging - similar to my case as I continue to go back through my catalogue and update/improve a lot of the metadata. If you don't save any previous edits done in Lightroom, then when you import the updated information (GPS coordinates in this case) generated in GeoSetter, all other edits will be lost if you did any.

3.) With each DNG file you want to geotag, updated with the latest metadata from Lightroom, you can now work with these files in a separate Geotagging program (GeoSetter in this case, since locr doesn't support DNG or RAW file formats).

4.) Tag your photos manually or automatically with GeoSetter, adding any additional metadata you want at that time. One interesting feature in this program is the ability to automatically populate the location fields in IPTC data (Country Code, country, province, city) once the image is geotagged. You can also do the same thing with altitude values.
5.) One you've tagged and saved the new data to your files in GeoSetter, you can then go back to Lightroom and "Read Metadata from files" to update the files in Lightroom with the GPS data (and any other location/elevation/metadata you've added).
6.) Repeat the process for any files you want to Geotag!
Overall I've found Geosetter to be more intuitive, user friendly and flexible than locr, so will probably use this program for all my geotagging needs.
1.) Find the files you want to geotag. If the files are currently in RAW format, I convert to DNG since storing metadata in RAW files can be problematic and/or keeping track of sidecar files can also be a chore.
2.) If you have imported your photos into Lightroom already, now is the time to save your metadata to the files - any changes, keywording, edits, etc. you've done to each file in Lightroom. This step is crucial, especially if you have done a lot of edits to your photos before geotagging - similar to my case as I continue to go back through my catalogue and update/improve a lot of the metadata. If you don't save any previous edits done in Lightroom, then when you import the updated information (GPS coordinates in this case) generated in GeoSetter, all other edits will be lost if you did any.

3.) With each DNG file you want to geotag, updated with the latest metadata from Lightroom, you can now work with these files in a separate Geotagging program (GeoSetter in this case, since locr doesn't support DNG or RAW file formats).

Screenshot from GeoSetter website.
4.) Tag your photos manually or automatically with GeoSetter, adding any additional metadata you want at that time. One interesting feature in this program is the ability to automatically populate the location fields in IPTC data (Country Code, country, province, city) once the image is geotagged. You can also do the same thing with altitude values.
5.) One you've tagged and saved the new data to your files in GeoSetter, you can then go back to Lightroom and "Read Metadata from files" to update the files in Lightroom with the GPS data (and any other location/elevation/metadata you've added).
6.) Repeat the process for any files you want to Geotag!
Overall I've found Geosetter to be more intuitive, user friendly and flexible than locr, so will probably use this program for all my geotagging needs.
Tuesday, February 3, 2009
More Vancouver Photos: Jericho Beach to the Sea Wall
UPDATE: I've now actually moved to Vancouver and have started a blog with daily posts here - Vancouver Daily Photo
_________________________________________________________________
It's interesting that after all the editing, I only chose one colour image and the rest are black and white. These first three images are from Jericho Beach Park south of downtown Vancouver. The remaining two images are from a walk around the Sea Wall at Stanley Park.


I wanted to get quite a contrast and silhouette in this photo, so I cranked up the dark and light to near max in post production. Although there is much more detail in the original photo, I really like how the blown out areas and over-dark areas work in this image.

Lions Gate Bridge, Vancouver
Monday, February 2, 2009
Vancouver Panorama
I recently grabbed this shot from a series of 7 shots in Vancouver. I've stitched them together with Hugin, and have been quite impressed with the seamless stitching it produces.
 I always find it difficult to appreciate a big panoramic image on the screen, since you have to scroll along at any decent resolution. The image will definately look better in a separate window (click image).

===================================
UPDATE: I've now actually moved to Vancouver and have started a blog with daily posts here - Vancouver Daily Photo
Saturday, January 31, 2009
Product Review: Royaltek RGM-3800 Geologger

I got this product almost a year ago in preparation for a long trip to South America. I looked into several options at the time, and this one had a good price point and the capacity that I needed for a trip lasting over two months.
The Royaltek RGM-3800 has space for 650,000 data points when recording standard information (Longitude & Latitude) with capacity decreasing when you add elevation, velocity, etc. Logging in this manner allows for 180 days of recording, 12 hours a day.
The one drawback to this particular device and most others of its size is the limited battery life. On two AAAs the battery lasts between 6-8 hours, so when outdoors or in remote places it limits the usefulness or makes you bring along a ton of extra batteries.
I got around this by using an external battery (Digipower shown) (connected by the USB port) which added a lot more capacity. [On the technical side, two AAAs usually have around 900mAh, and the Digipower device has 3400mAh, giving approximately 4X longer life.] With this battery pack, I got about 3-4 days use out of it between charges.
The log files are stored in the .nmea format, compatible with many geotagging programs, but I've found a useful program for converting .nmea files to KMZ/KML (Google Earth) or GPX if you need to convert to different formats.
Overall a great product I’d recommend for anyone interested in Geotagging their photos on a long or short trip.
Subscribe to:
Posts (Atom)