Wednesday, January 12, 2011

Migrate Picasa Face Tags to Lightroom Metadata

It's been on my list for a while now, and I finally got around to searching for and trying out a few methods to migrate Picasa face tags to Lightroom Metadata.  I really like the capability of Picasa in it's ability to tag faces, and as my collection of images gets ever larger this feature will become more and more important in my work flow I think.  The limitation always was that you couldn't use this information in any other program, without painstaking manual work with keywords.

One major use I have for it is determining all the photos where one (but especially two or more people) appear.  This is very useful for prints, photo books, or just tracking down those photos you forgot you had.

The first option I've found to help migrate Picasa Face Tags into images directly is with AvPicFaceXmpTagger.  The summary below (from its wiki pages) gives an idea of what it does.Click on the title for the creators website/download.

The program seems to work with DNG files as well, from the tests I've done on it.  As always, back-up your data and catalogue before trying "new" things like this.

The next tool I'm looking into for this process is Jeffery Friedl's "Picasa Face-Recognition Import” Lightroom Plugin which seems to do much the same thing, but with a bit different final results.


=========================================

AvPicFaceXmpTagger

This program was written because of the new Google Picasa 3.5 face recognition feature. Due to the fact that Picasa 3.5 doesn't store the face recognition data inside JPEG pictures, this program fetches that data and stores it as XMP-MP meta tags inside the JPEG pictures.


The Picasa 3.5 face recognition feature stores the face data inside the Picasa database. As a consequence this data is lost when you give away your pics and this data cannot be shared with other users or with other Picasa instances running on different computers. Luckily Picasa stores the face recognition data (persons & faces) in quite simple text files so reading that data is not a big clue.
 
There is already a method available how to store face recognition data inside JPEG pictures. This method uses XMP tag system created by Adobe with the addition of Microsoft XMP namespace Microsoft Photo Region Schema and is used by Windows Live Photo Gallery.


Right at the start this program reads the Picasa text file holding the persons (contacts). Each person has assigned an unique person ID. For every file of for all files in a directory which is added to the list of files or directories the picasa.ini file is searched for face definition. If face definitions are found for a file, they are added as XMP tags. Optionally, the person names are also added as IPTC Keyword tags.

The actual tagging of the JPEG files is done using ExifTool - a great and widely accepted/trusted tagging program which is known for its good makernotes handling (to leave them intact).



Monday, December 13, 2010

Vietnam :: Hanoi & Ha Long Bay PhotosHanoi, Vietnam

I've recently just signed up for Photoshelter again, they had a 30-day Free offer I couldn't refuse! 

I've started to upload my archive there, with hopes of getting some better exposure, sales, and SEO online.  My trip to Vietnam earlier this year was first on the list for this upload.  Below are a couple galleries from the start of the trip.


Hanoi

Hanoi - Vietnam - Images by Alex Evans

Ha Long Bay

Halong Bay - Vietnam - Images by Alex Evans

Friday, April 2, 2010

Microstock Statistics :: iStockphoto Top 500 Contributors

I recently revisited the istockcharts website in hopes of gaining a bit more insight into the world of Microstock.  Looking at the top 500 contributors, in terms of downloads, I was able to sermize a few things about iStock and the industry in general.   Please note that 64 contributors were "xxx" out at istockcharts and the reliability of the data may not be exactly accurate, but interesting data all the same.

I found it very interesting to take a look at the data in excel and sort, average, and develop stats for this list.  Some observations:
  • Of the top 500 contributors at iStockphoto, they joined on average in May 2005, with the first contributors joining in Feb 2002 and the last contributor in the top 500 joining in May 2008
  • On average they have 2,275 files online the max being 16,289  while the min is 151
  • The total files combined for all these contributors was 991,990 and represents 16.8% of all the files currently on iStock.  
  • What's interesting is that although they only represent 16.8% of the number of files they account for over 40% of the downloads (or 32,001,000).
  • So the Top 500 in iStock (or top 436 in this case due to some accounts having no information) they only represent 1.5% of the contributors, but account for over 40% of the downloads!!
Some graphs and visual stuff to compliment the observations:

Total Number of Downloads for the Top 500 Contributors at iStockphoto
 
Number of Files Online Vs. Total Number of Downloads


So, it seems that I'm a very small fish in a very big pond!!

Thursday, March 25, 2010

Microstock Photography - Return on Investment (ROI)

Over a year and a half ago I registered at a few microstock sites to see how I'd do with it, but it very quickly faded from my daily routine - either from lack of results, rejection, or just life getting in the way of one of my many ideas.

I had about 50 images at StockXpert, but they've since closed (moved to Veer) and the $1.00 I made will never be recovered.

I have far fewer images at iStockPhoto and Dreamstime, with combined sales of $6.50. I think the payout threshold is $50 or $100, so at this rate I'll be lucky to be paid out before I'm 65. To be fair, I only have 3 approved photos at each site so the return hasn't been too bad considering such a low number.

I've decided to give it another go, with mixed feelings. Part of me thinks that spending such a lot of time for such little return is a waste of time. Part of me just wants to experiment with this avenue of sales and see if it's really for me. At the moment I'm way behind on my Return of Investment (ROI) with the amount of time I've spent on Microstock in the past and the time I've recently put in. We'll see how this goes and maybe I'll be able to show some interesting graphs and reports down the road like Lee Torrens over at MicrostockDiaries does.

Future post....an update on my progress in 2010!!

Monday, March 22, 2010

Get The Most Out of Your Canon PowerShot

A while back I discovered that in many Canon digital camera models, a fairly easy hack to be added (through the memory card, so it's non destructive) which gives you a bunch of added functionality to your camera.   Enhanced Image Capture, Additional Information On-Screen, and Additional Photographic Settings are a few of the major changes you can make to your camera.

The site to check out is the CHDK Wiki dedicated to all this stuff.  Lots of information on that site, but first thing to do is check your model number and firmware version to see if your camera is supported.

With this add-on I was able to create a time lapse movie last year of my trip through the Rockies from Revelstoke to Calgary.


A bunch of other mini-programs can be downloaded and used from the site mentioned above - like time lapse, motion detection and advanced bracketing.  So if you have an old Canon PowerShot lying around, give it a try!

Another interesting article over at Lifehacker about getting the most out of any point and shoot camera found here.  And a more extensive overview of enhancing your camera through CHDK here.

Monday, March 15, 2010

Google Trends & Microstock

I'm often curious to see trends on Google Trends, and also curious to see what I can gather from this site to better position my photography focus in future shots.  Hunting around for some various terms I came across some interesting comparisons.

General Market

Getty vs Corbis vs Microstock - Corbis seems to have been overtaken in this metric by istock around mid 2007.


Getty (red) vs Corbis (purple) vs Microstock (blue:istock, green: shutterstock, yellow: Fotolia)

Microstock Battle - istock seems to be declining slightly since the end of 2008, Fotolia seems to have a continuing upward trend, while Shutterstock seems to have had a plateau in 2009, with a spike in searches at the beginning of 2010.


Microstock Trends (blue: iStock, yellow: Fotolia , red: Shutterstock , green: Dreamstime, purple: 123rf)

Some Other Interesting Photo Topics:

Royalty Free versus Creative Commons
Film versus digital
Selling Photos versus Buying Photos

The searches above aren't exact by any means, but an interesting exercise none the less to gather a snap shot on topics.  Something to keep an eye on for ideas and research.

Monday, March 8, 2010

Microstock Statistics :: iStockphoto

I came across an interesting site the other day:

iStockcharts

This site seems to aggregate many of the statistics from every contributor to iStockphoto and display it in tabular form.  The data is sortable using the various headings (below) at the top of each page. 
  • Contributor
  • Total DLs
  • # of Files
  • Market Share of Files
  • New Files in last 30 Days
  • # of Reviews
  • Reviews per File
  • Member since

Tuesday, March 2, 2010

Travel Photography - Preparation, Shot Lists, and Gear

While I've been on a few trips, this is the first trip that I've been preparing for with a specific plan to take potentially marketable images - either for stock, fine are, or editorial.  I'll be traveling to Vietnam for a few weeks in March, and will be taking in the major site of Hanoi, Halong Bay, Hoi An, Ho Chi City, Mekong Delta, and Island. 

Preparation

Researching the different locations, noting the top sites, times of day that might be best in certain locations.  For stock photography I've visited a number of existing sites to see what types of images exist already, what ideas I may generate from these images, and how I need to make my images different and unique to become more salable.   Some of the sites I've visited, searching for various keywords, have been: Photoshelter, iStockphoto, Alamy, and Getty Images.

Shot Lists

Knowing what you want to shoot, when, and where will be key in saving time and making the most of the limited time you'll likely have at each place.  A few major categories I'll be concentrating on in each place:
  • Skylines, expansive views with a sense of place
  • Street scenes, people, restaurants (exterior, interiors, food)
  • Culture (customs, juxtaposition, old/new)
  • Historic monuments and buildings (hopefully with unique angles / perspective)
  • Shopping (markets, buying/selling, interaction)
  • Story telling close-ups or details (image series, multiple angles of same subject)
  • Special events, holidays, etc. in each place
A couple articles I found with more information on putting together and researching a shot list are here and here.

Gear

In previous trips, I either didn't have an SLR Camera or chose not to take it, trading off image quality and flexibility for a lighter load and less liability.  From those trips to this one I'm much more focused on images and capturing that sense of place, than I am on a camera that fits in my pocket.  I'll still be taking a relatively small amount of gear with me, which would be considered Amateur and not Pro, but the potential for better images has increased ten fold from my previous point-and-shoot trips. 

Nikon D80, with 18-200mm VR II DX lens
GorilaPod tripod, mainly for night shooting or indoor
Memory Cards (4-16 GB)
Charger
GPS / Battery Pack for Geotagging photos (see previous post)

Tuesday, February 23, 2010

Monetize Your Images :: With Microstock

I've recently gotten back into the idea of monetizing my images and there are a number of options one can pursue to make money from your photos.  Microstock is one of those options...

Microstock

A contentious avenue for sales to some and one I haven't put a lot of time into.  I've been getting back into it, but slowly.  Keeping the motivation going through rejection, a large amount of time editing and keywording images, with little payoff in the beginning has been a struggle.  But I'm determined to give it a go and see where I end up - I'll be updating my progress here in future posts.

Microstock is mainly Royalty Free images requiring a model/property release (if applicable) and counts on multiple sales of the same image to recoup the cost of production due to the low cost per image in microstock.  Sales typically range from $1.00 - $20.00 per image, with only a percentage of that going to the photographer.  It is open to anyone with a decent camera (usually 4-6 mega pixels and above), but most sites have quality standards that you must meet in order to submit images for sale on their site.

A few of the major microstock sites to check out if you're interested in this:

iStockphoto
Shutterstock
Dreamstime
CanStockPhoto
Fotolia

Friday, February 19, 2010

A Long Hiatus

A long hiatus from this blog...over a year!!  But I'm back and have resolved to get some regular posting in.

I've recently revisted my ambitions of becoming a pro photographer.  While, at this rate the going has been very slow, I'm excited at the possibility of growing my knowledge and skills as a photographer.  And if it takes a while, if ever, to reach that label "PRO" then so be it.

I haven't been shooting nearly as much as I should be, but I think that's the case with most photographers.  Makes me think of the book title from Chase Jarvis I cam across the other day "The Best Camera Is The One That's With You: iPhone Photography".  I haven't read the book, but inspiring none the less.

A few Photos from 2009:

Vancouver Skyline, Float Plane Overhead

Prince Rupert, British Columbia

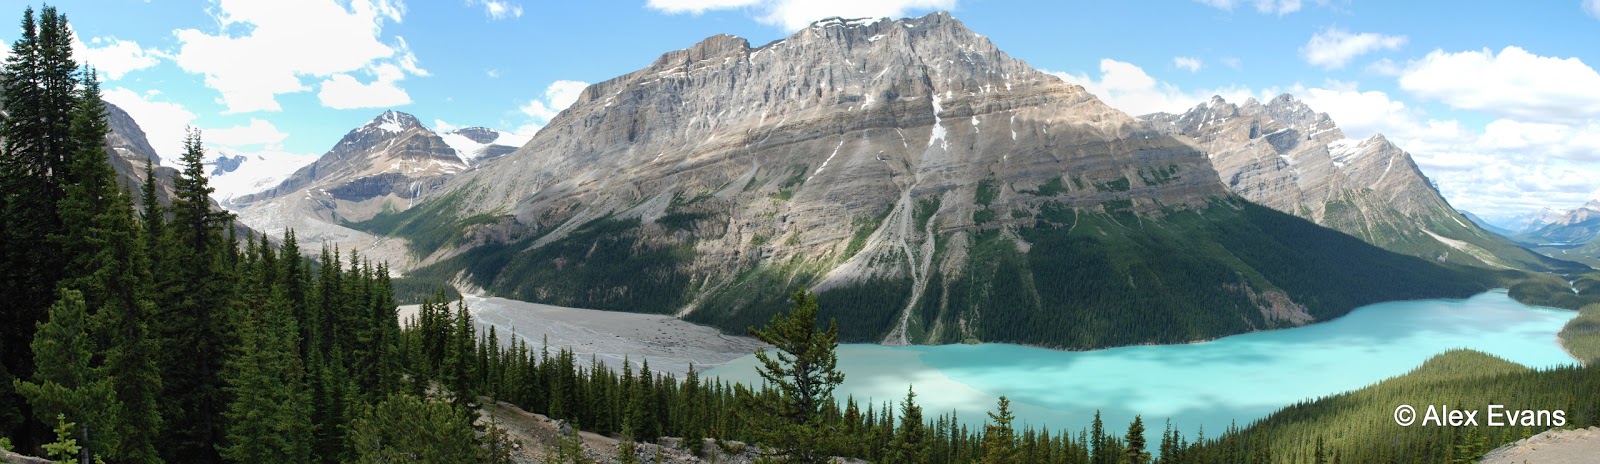
Peyto Lake, Jasper National Park, Alberta


Friday, February 6, 2009

My Geotagging Workflow: RAW / DNG Files and Lightroom

Although I haven't tried any dedicated plug-ins in Lightroom for geotagging photos (one is available here), the workflow below is relatively straight forward and allows you to geotag photos manually or automatically with a GPS track file (NMEA, GPX). I've summarized a workflow for geotagging JPEG files using the program locr already, but in this post I'll concentrate on DNG files (and RAW files, assuming you'll be converting your RAW files to DNG format). Adobe has a pretty straight forward converter for this here.

1.) Find the files you want to geotag. If the files are currently in RAW format, I convert to DNG since storing metadata in RAW files can be problematic and/or keeping track of sidecar files can also be a chore.

2.) If you have imported your photos into Lightroom already, now is the time to save your metadata to the files - any changes, keywording, edits, etc. you've done to each file in Lightroom. This step is crucial, especially if you have done a lot of edits to your photos before geotagging - similar to my case as I continue to go back through my catalogue and update/improve a lot of the metadata. If you don't save any previous edits done in Lightroom, then when you import the updated information (GPS coordinates in this case) generated in GeoSetter, all other edits will be lost if you did any.


3.) With each DNG file you want to geotag, updated with the latest metadata from Lightroom, you can now work with these files in a separate Geotagging program (GeoSetter in this case, since locr doesn't support DNG or RAW file formats).


Screenshot from GeoSetter website.

4.) Tag your photos manually or automatically with GeoSetter, adding any additional metadata you want at that time. One interesting feature in this program is the ability to automatically populate the location fields in IPTC data (Country Code, country, province, city) once the image is geotagged. You can also do the same thing with altitude values.

5.) One you've tagged and saved the new data to your files in GeoSetter, you can then go back to Lightroom and "Read Metadata from files" to update the files in Lightroom with the GPS data (and any other location/elevation/metadata you've added).

6.) Repeat the process for any files you want to Geotag!

Overall I've found Geosetter to be more intuitive, user friendly and flexible than locr, so will probably use this program for all my geotagging needs.

Tuesday, February 3, 2009

More Vancouver Photos: Jericho Beach to the Sea Wall

UPDATE: I've now actually moved to Vancouver and have started a blog with daily posts here - Vancouver Daily Photo
_________________________________________________________________
It's interesting that after all the editing, I only chose one colour image and the rest are black and white.  These first three images are from Jericho Beach Park south of downtown Vancouver.  The remaining two images are from a walk around the Sea Wall at Stanley Park.


I wanted to get quite a contrast and silhouette in this photo, so I cranked up the dark and light to near max in post production.  Although there is much more detail in the original photo, I really like how the blown out areas and over-dark areas work in this image.
Lions Gate Bridge, Vancouver

Monday, February 2, 2009

Vancouver Panorama

I recently grabbed this shot from a series of 7 shots in Vancouver.  I've stitched them together with Hugin, and have been quite impressed with the seamless stitching it produces.

I always find it difficult to appreciate a big panoramic image on the screen, since you have to scroll along at any decent resolution.  The image will definately look better in a separate window (click image).
===================================
UPDATE: I've now actually moved to Vancouver and have started a blog with daily posts here - Vancouver Daily Photo

Saturday, January 31, 2009

Product Review: Royaltek RGM-3800 Geologger


I got this product almost a year ago in preparation for a long trip to South America. I looked into several options at the time, and this one had a good price point and the capacity that I needed for a trip lasting over two months.

The Royaltek RGM-3800 has space for 650,000 data points when recording standard information (Longitude & Latitude) with capacity decreasing when you add elevation, velocity, etc. Logging in this manner allows for 180 days of recording, 12 hours a day.

The one drawback to this particular device and most others of its size is the limited battery life. On two AAAs the battery lasts between 6-8 hours, so when outdoors or in remote places it limits the usefulness or makes you bring along a ton of extra batteries.

I got around this by using an external battery (Digipower shown) (connected by the USB port) which added a lot more capacity. [On the technical side, two AAAs usually have around 900mAh, and the Digipower device has 3400mAh, giving approximately 4X longer life.] With this battery pack, I got about 3-4 days use out of it between charges.

The log files are stored in the .nmea format, compatible with many geotagging programs, but I've found a useful program for converting .nmea files to KMZ/KML (Google Earth) or GPX if you need to convert to different formats.

Overall a great product I’d recommend for anyone interested in Geotagging their photos on a long or short trip.

Thursday, January 22, 2009

Obama's Inauguration - That's what over 1 million people looks like

I got this link from a post on the Chase Jarvis blog.  The incredible satalite imagery at GeoEye took a snapshot of the inauguration, with over 1 million people in attendance. What a moment in time to capture so high above the earth!

Image Courtesy of GeoEye.

The high resolution image is even better and shows a much larger area.

Monday, January 19, 2009

Alamy Upsize Tool

I’ve recently started using Alamy for an avenue of image sales. One of their requirements is that the image must be over 48Mb uncompressed. At first I was a little confused as to what that means for the actual image size and the resulting dimensions that are required. After finding some info on the web with formulas, etc. I came up with this spreadsheet that allows you to easily figure out how big your new files has be to get the right size file. Simply enter in your original image dimensions, desired final uncompressed file size, and the resulting new image dimensions appear in the cells below. Try it out below.


This information is all I need to enter into many resizing software programs in order the get the right file size every time.

My Geotagging Workflow

Google Earth Screenshot - Iguazu Falls (Argentina/Brazil) with images and Data Logger Track

1.) Sync Camera time with Local Time

2.) Take photos while logging your location continuously with a Data Logger

3.) Import JPEG photos and Data Logger log (.nmea format) onto computer

4.) Use software locr to combine JPEGs and location log, embed into file. This program can also export your geolog file and photos into Google Earth. And if you happen to forget to sync your camera time to your local time, you can shift this time by minute/second/hours to match your geolog (which will be on UTC time)

5.) If using Picasa, the newly geotagged photos won’t be recognized by this program (something to do with the format of the GPS data). I got around this by using this GUI to change the format of the GPS EXIF data to something Picasa could read. If you don’t use Picasa then you shouldn’t need this second step.

6.) More on Geotagging RAW images in later posts.

Now as GPS becomes more integrated into cameras, then there will be less need to have separate devices logging your location as you take photos. I haven’t tried any cameras with this integrated technology yet, but I think it’ll become a feature seen in many more models to come.

Friday, January 16, 2009

Theme: Interesting Rock Textures and Formations

After submitting this first image below to a local competition here in Calgary through the Foothills Camera Club, I thought I'd hunt around for some other interesting rock formations in my catalog.  After a bit of searching, I've found these three.

Garganta Del Diablo (Devil's Throat),  Valles Calchaquies, Chile
SD700 IS, 1/60 sec, f/2.8
Mystic Beach, Vancouver Island, Canada
D80, 1/60 sec, f/4.0, ISO100

Atacama Desert, Bolivia
SD700 IS, 1/200 sec, f/5.6

Thursday, January 15, 2009

New Secure Digital (SD) Cards - Up to 2TB (2 terabytes!)

I've been looking for a new SD Card this week, and although that wouldn't usually be that newsworthy, I came across some interesting information in my research and "hunt for the best deal".
What blew me away was finding out about the anoucement at CES that a new format - SDXC promises up to 2TB of storage and 300MBps transfer speeds (all theoretical at the moment unfortunately), but according to Engadget,
"The first batch of retail cards will hit before March [2009] with read/write speeds up to 104MBps in unknown capacities"
Not that these new cards would be the "best deal", from from it, but that's a lot of photos!!